
TekStandSoloShelf
Set it up
Pick your ground
Level, firm, and clear. Avoid slopes, soft sand, loose gravel, and mulch. On grass, press each foot down until it stops sinking.
Open the tripod base
Spread all three legs out fully until each one stops. Confirm every leg is locked before any weight goes on the stand.
Attach the mount bracket
The mount bracket ships detached — it's wider than the folded stand, so it comes off for the box. With the pole still at its lowest setting, attach the bracket to the center column using the included hardware and tighten evenly until snug. Give it a firm wiggle: zero movement before any TV goes near it.
Set your height
Loosen the height collar, raise the pole to your viewing height, then retighten fully and seat the safety pin. The range is 55" to 70" measured to the mount. Lower is steadier — use the lowest setting that clears your crowd. Never let the collar alone hold the height.
Bolt the arms to your TV
Lay the TV face-down on something soft. Attach both arms vertically to the back, hooks facing up, using screws from the hardware pack. Slide them along the hole column to match your TV, keeping both level. Don't overtighten into the panel.
Hang the screenTwo people
One person steadies the stand, one lifts. Drop both hooks over the crossbar and confirm they're fully seated. Then hand-tighten the two thumb screws underneath — these stop the TV lifting back off. No tools needed, but they must be snug before anyone lets go.
Add the shelf
Open the shelf collar
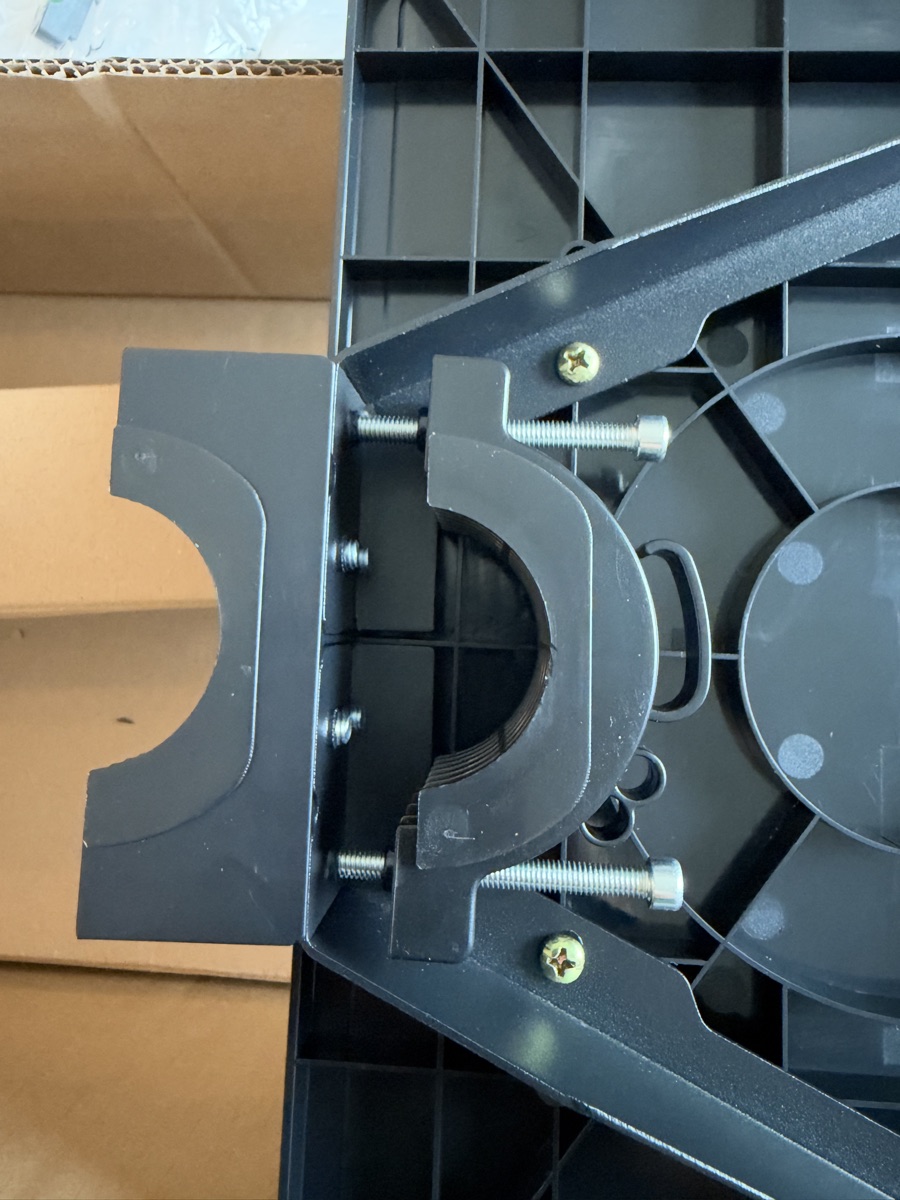
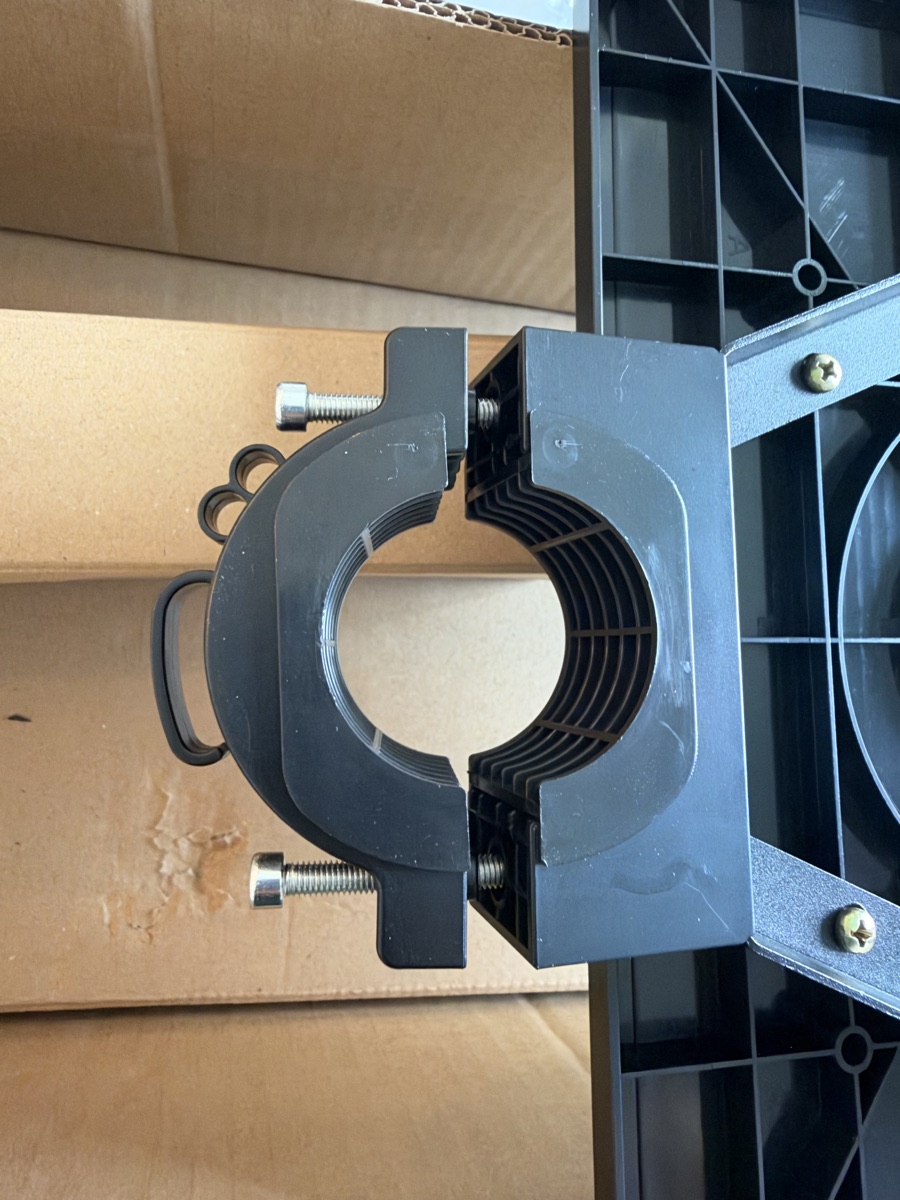
The shelf ships partly assembled: the rear half of the collar is already bolted to the shelf bracket, the front half is loose in the box, and the two long socket-head bolts are parked in the rear half from the bracket side. Using the hex key included in the box, back both bolts all the way out and set them and the front half where you can reach them.
Position and clamp
Hold the shelf against the center column below your TV, platform facing forward, so the pole sits in the rear half's ribbed cradle. Bring the front half around the pole, line up its two holes with the rear half, and thread both bolts in from the front through both halves into the bracket. Snug them with the hex key in turns — a few turns on one, a few on the other — until the collar is tight and the shelf is level. Don't fully tighten one bolt before starting the other; the two halves need to close evenly or the collar will bite the pole crooked.
Load your gear
Set your soundbar, streaming box, or speaker on the shelf — 15 lbs max, kept centered. Route its cables down the pole with the TV's. The shelf moves with the screen, so your sound always fires from the right height.
Level, tilt, and test
Set your tilt, then push gently at the top of the pole. Any rocking means a leg or lock isn't seated — fix it before you power on. Re-check after ten minutes; fasteners settle under load.
Route your power
Run the cords down the pole and along one leg, never across the walking path. Use outdoor-rated cord and keep connections off wet ground.
Know your parts
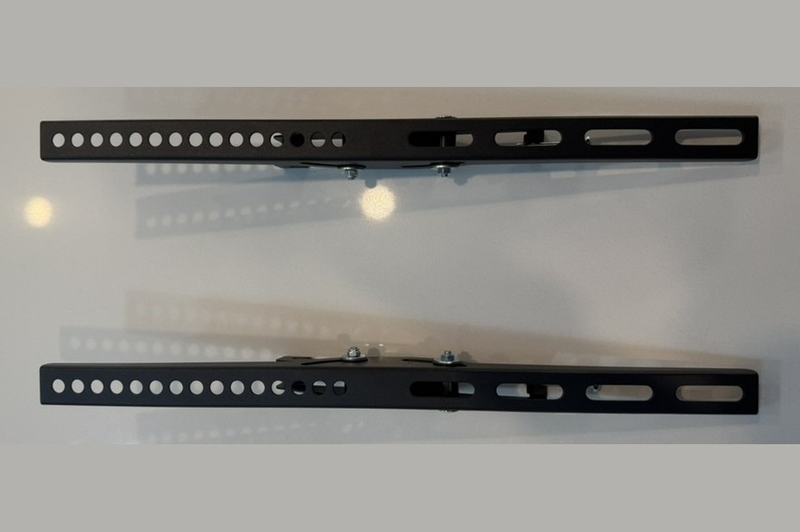 Mounting arms ×2
Bolt to the back of the TV. The column of holes sets how high the arms sit on the panel — keep both at the same height so the screen hangs level.
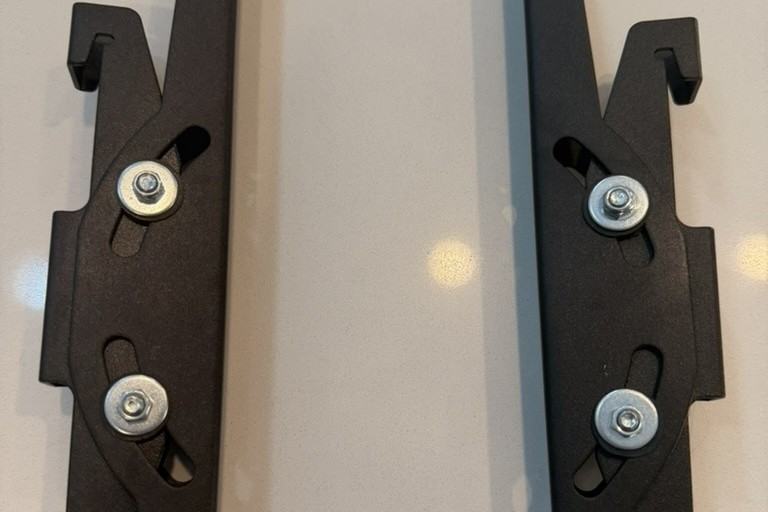 Hooks & tilt plate
The hooks face up and drop over the crossbar. The screw at the bottom clamps the arm to the stand — this is what stops the TV lifting back off the hooks.
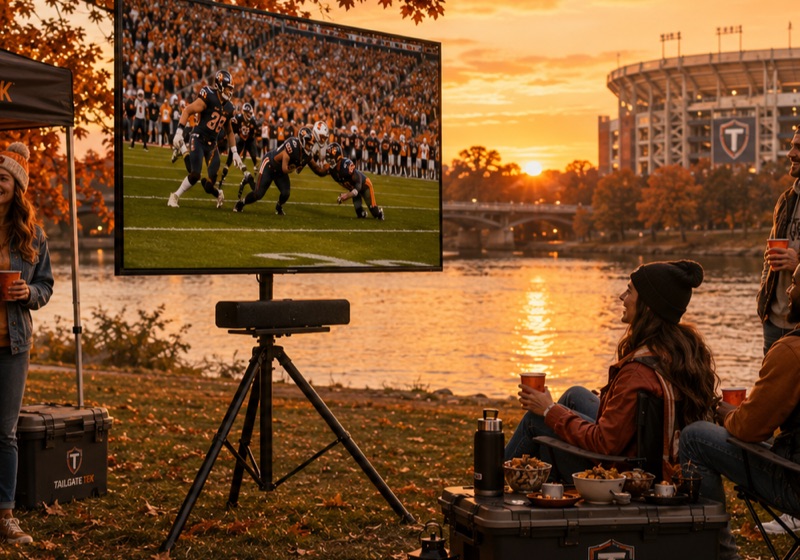 Equipment shelf
Clamps around the center column below the screen with a two-piece ribbed collar and two long socket-head bolts. The rear half comes bolted to the shelf bracket; the front half and bolts go on at setup with the hex key in the box. Rated for 15 lbs — enough for any soundbar, streaming box, or portable speaker. Tighten both bolts evenly.
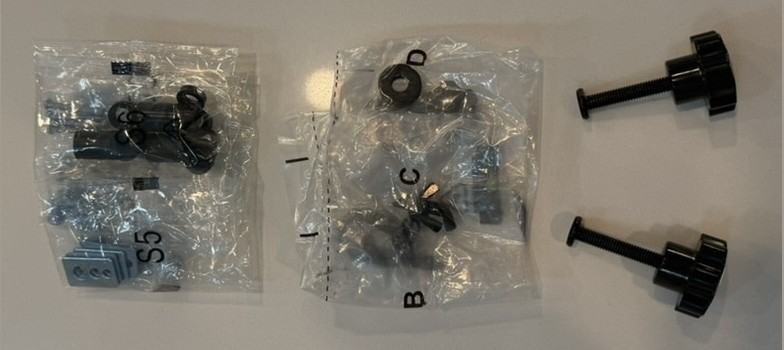 Hardware & thumb screws
Bags S5, S6, B, C, and D hold the VESA screws, washers, and spacers. The two knurled thumb screws are hand-tight, no tools. Your TV takes one screw size — test-fit before driving any screw home. Check your TV's VESA pattern first: the arms fit 100×100 up to 600×400 mm.
Pack it down
Clear the shelf, then the screen
Take your gear off the shelf first, then remove the TV before lowering the pole or folding any leg. Collapsing a loaded stand is the fastest way to break a screen.
Lower, fold, wipe
Drop the pole to its lowest setting, fold the legs in, and wipe down before it goes back in the vehicle. The shelf can stay clamped for transport or come off with its two bolts — either way, dry the hardware if it rained.
Specs
| Screens | 1 |
| Screen size | 23" to 75" |
| Max screen weight | 100 lb |
| Shelf capacity | 15 lb |
| VESA range | 100×100 to 600×400 mm |
| Height range | 55" to 70" |
| Tilt | 15° |
| Retracted (H×D×W) | 40" × 4" × 26" |
| Deployed (H×D×W) | 75" × 27" × 26" |
Safety
Tip-over and falling-object hazard. A falling screen can cause serious injury or death. Read all instructions before use.
- Do not exceed the rated screen size or weight. Check your TV against the spec table before mounting.
- Never exceed the shelf's 15 lb rating. Keep shelf items centered, and never use the shelf as a step, seat, or table.
- Never allow children to climb, hang on, or play near the stand. Keep children and pets clear during setup and takedown.
- Take the screen down in wind, and never leave it up unattended or overnight. A mounted TV is a sail — if the wind could move an empty camp chair, take it down.
- Use on level, firm ground only. Never on slopes, soft sand, truck beds, or any moving surface.
- Two people are required to lift and mount the screen. Never attempt it alone.
- Both hooks seated and both thumb screws tightened before releasing the screen. Hooks alone will not hold a TV.
- Do not modify the stand or substitute hardware. Stop using it if any part is bent, cracked, or missing — contact us for replacements.
- Keep cords out of walkways and off wet ground. Use outdoor-rated cords only.
We answer every email — don't force a part.